Choose your country
Delivery choices and times vary depending on your location
About this item:
5.0 out of 5
100.00% of customers are satisfied
5.0 out of 5 stars Loads of features for excellent price
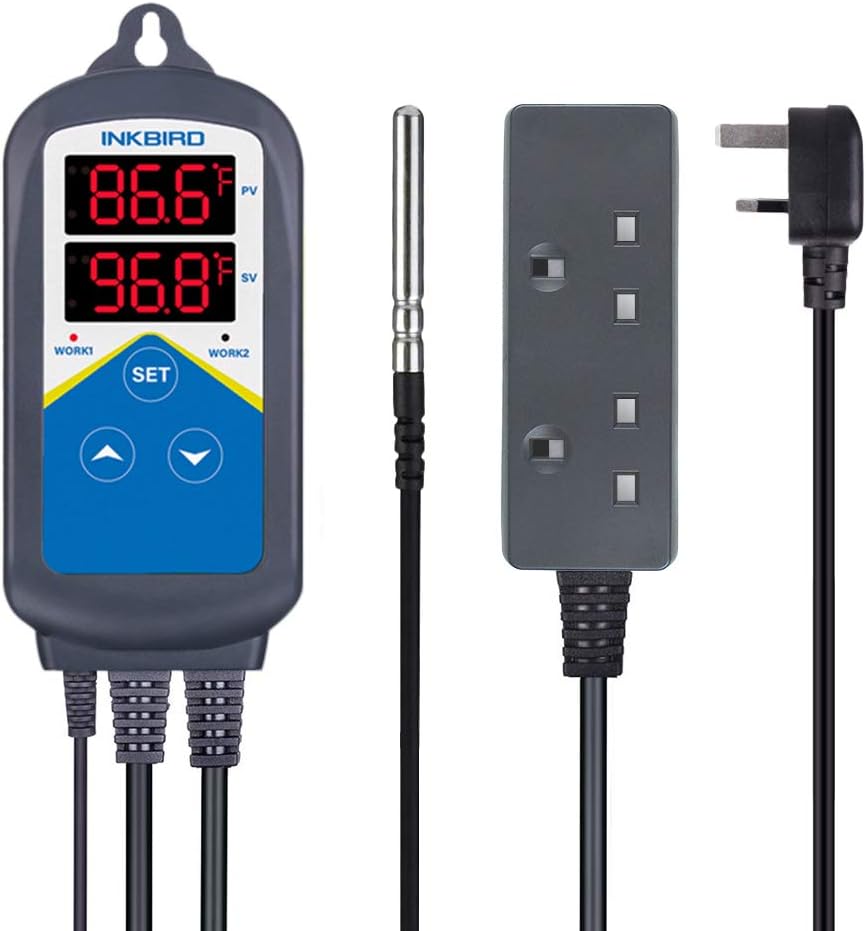
I first bought the Vivosun thermostat, but that is pretty basic compared to this. I was put off initially from this by some reviewers saying it was difficult to use or instructions were confusing. Then I regretted it, realising this offers far greater flexibility, and better temperature consistency. The Vivosun thermostat has no temperature differential setting, so will not allow you to set how far from the set temperature it switches on: sometimes, it continues to heat above the set temperature, and can fall to more than 5 C below the set temp. So you end up with a temperature range of 6-7 degrees C, which for some seeds, can be too much. Unlike the Vivosun, the Inkbird allows you set the temperature differential, and has a timer to set two different temperatures within 24 hours. Plus, it can control 2 devices, although both are controlled from the same sensor.Instructions/set-up:It comes with an English instruction leaflet, which, despite minor errors, is perfectly understandable, not the gibberish you sometimes get, so found set-up straightforward.Three small issues: some letters don't display correctly on the screen (on mine at least), the T in TS1, for example, but you can refer to instructions (don't loose them!). Have since realised it is a small T, but some screens are still bit confusing. I go by the order (see set-up below).Also, the instructions should've been explicit about either pressing SET for 3 secs to save and quit, or briefly, to move on to the next function.Lastly, I would've made the instructions larger print - it's very small.It has 2 screens, normally, the top one shows the set temperature, and the bottom one the actual temperature. To change settings, you press the SET button for 3 - 5 secs, then the top one shows the parameter, so which menu function you're setting, and the bottom one the current value for that function, which you adjust with the arrows. It comes with certain default settings, hence some thinking it has no timer, as set to 'off' by default. It comes set to 25 C, and if those settings suit, you can plug and play. To change the settings, you have a list of parameters, like TS1, Temperature Setting 1, and you set each, then press the SET button for 3 secs to save it and quit the set-up menu, or as said, press SET briefly to move on without changing. You start again for each new setting, after saving the last one. For those who want to know, I explain the further set-up after the rest of this review. The instructions have tables listing the parameters in order, one table for timer off (as you get fewer menu options), one for when the timer is on, and one each for F and C, with default settings and options for both. It adds explanations for most menu functions, gives error codes, a setup flow chart and the specifications (which the Vivosun does not, not even on their website).General features:This also has quality control marks, which the Vivosun doesn't. The set-up process is a bit long-winded, granted, but it doesn't take that long. At this price, you can't expect too much: compared to the Vivosun, which might be a bit cheaper, this offers far better value for money, as well as compared to other thermostats, many cost more and offer fewer functions. I checked the temperature using a digital kitchen thermometer: at first, it was 0.3 degrees off, but then inserted the sensor right to the hilt, after which it was spot on - no innuendos intended! Btw: the deviation in photo is due to sensor being removed.The units are 0.1 degrees, so the temperature and differential settings can be set to say 22.5 or 22.2 degrees, rather than only whole degrees (as with Vivosun).Both the sockets for the heating devices and the thermostat itself can be hung up, and you have the option to change the sensor (they sell a longer one separately) - being able to unplug the sensor cable is handy if the wires get tangled.There are 2 lights, one for each heating device, which light up when it is heating, although I'm not sure about the purpose of the 2nd light: as you've only got 1 sensor, both devices always heat together..According to specs, this is rated for a maximum output load of 2200 Watts at 220 V, so you can you can plug quite powerful heating devices into it. Even a really large heating mat and a long heating cable would come to far less.With this one, you don't end up accidentally pressing the setting buttons by mistake, as you need to press SET for 3 secs to initiate any changes, whereas with the Vivosun, the C/F setting is done by pressing 2 buttons together briefly, so this you can easily change them accidentally.One negative: needs longer power cables. The one between thermostat and sockets is less important, although at 18 cm is very short. The flex to the plug is 1.40 m: not too bad for most devices, but you might use a thermostat in out-of-the-way places, so could be longer. Although the sensor cable is 2 m long, including the little in-line plug for the sensor, which is very close to the thermostat.The Inkbird keeps its settings if you unplug it (except current time) and has an ultracapacitor, which when full, will keep the timer working for 20 days without electricity, handy for powercuts or accidental unplugging - although have not tested this. It also has quite loud alarms for over-heating and sensor fault (I tested the latter by unplugging, and it works) and one for the timer, as current time needs to be re-set after unplugging (if the timer is used).Overall, am very happy with this, think it excellent value for money and recommend it. Have attached a couple of photos, in the 1st picture, the plug you see in the socket is for the heat mat, and the cable on the bottom right of the thermostat leads to its plug .Edit: I bought 2 of these, back in 2017, one I used outdoors in a waterproof box, for a heated propagator, and one indoors, for same. I used the indoor one for around 2 years, on and off, and now, 2022, am using one of them again, and both are still working. I did have to buy a replacement sensor for one, but it was about £13, and since then, it has worked fine. Also, like that you can get replacement sensors.. and that you can still get them, 5 years later.More to set-up:Now, because some might hesitate to buy because of reported difficulties with set-up, I will try to briefly explain the set-up. After setting and saving TS1 by pressing SET for 3 secs, as above, you've quit the menu, so you start again by pressing SET for 3 secs, then once it shows TS1, you briefly press SET to move on to the next menu setting. After TS1, you have DS1, the temperature differential for TS1, which, again, you either set with arrows, or leave as it is, briefly pressing SET to move on. Then you have CA, calibration, the only function I don't fully understand, but think it'll probably become clearer if I need it. After that, you have CF, Celsius or Fahrenheit, then TR, where you set the timer to off or on. 0 is off, 1 is on. If you select 1, then save and quit, next time you go into set-up, you can set a 2nd temperature: the menu will run through as above, but after TR, you'll have TS2 (2nd temp), DS2 (2nd differential), then TA, the time TS1 comes on, TB, when TS2 comes on - instructions say you can only set to full hours and it's a 24 hour clock, but: each timer has 2 steps in the set-up: TAH (Timer A Hour) and TAM (Timer A Minutes) and the same for TB. I've not tried setting the minutes, have just left this at 0. TS1 is set by default to come on at 8.00 and TS2 at 18.00. Again, you set and save each separately, as above. After TB, you have the settings for the current time, with TH being the current hour on a 24 hour clock and Tm being the current minute setting from 0 - 60. Hope that's helpful - even if this sounds complicated when reading, once you start, it becomes clear.
5.0 out of 5 stars Solidly made piece of kit
With rising heating costs keeping a greenhouse more than frost free is prohibitive these days which means using heated propagators and heat pads to provide localised and specific heating both for overwintering and for raising seedlings and plugs.And that means more thermostats which, in many cases are too large to allow waterproof outdoor sockets to close.When I dismantled all the plugs and wires and turned the greenhouse over to tomatoes and cucumbers this spring I noticed one thermostat was cracked and brittle, so bought this as a replacement. I don’t really need cooling, being retired I can switch a fan on if needed, not that is that effective really, or do some damping down, which does bring temperatures down.Having two thermostats one unit is useful though, the one with the sensor can be used in with the probe in a pot in a gravel tray sitting on a heated pad, while the general channel, using the ambient temperature, is ideal for the greenhouse fan heater. The independent channels allows you to keep the greenhouse frost free on one channel, with higher temperatures set for germinating or growing plants which require heat on the other.The range of temperatures, from -50 to 99 deg C is way beyond what is needed in a greenhouse where starting somewhere around 3 to 5 C as a base level would cover most frost free situations with the second channel set up to whatever more tender plants or seedlings need.There is also an option to have separate day and night temperatures which is useful for reptiles but less so for plants where a constant temperature is more important.Bought at the start of summer for what is a good price, the unit seems well built and uses as standard three pin plug on a training lead allowing the cover on the sockets to close.That leads to the unit with a trailing double socket off where you can plug in heater, heat pads or whatever you want to use.It is a neat, solid unit with a clear display and logical instructions, which appear a lot more complex than they are, especially if all you want is to maintain minimum temperatures, but with even night greenhouse temperatures in double figure centigrade first impressions are not that useful as the unit is not able to carry out the function for which it was bought. The signs so far are good but we will update the review once winter returns.
5.0 out of 5 stars Good value, easy to use.
Compared with competitors inkbird devices are very good value and generally well made. This is my first wifi version and it just seems to work: straightforward connection, no fiddling with bluettoth settings or anything an stable connection. It's not immediately obvious which timer does what but it becomes obvious as soon as you change the settings, which the app makes a lot easier than using the button.The app is fine and stable, if a little basic. The temp graph alway starts super zoomed in and it would be nice to get a little more detail. Eg seeing how long the heating had actually been on in a given period (day/week/etc) would be super useful (a power draw meter would be fine upgrade).I use it (along with a humidity contoller) to control a heated greenhouse. Perfect for this at a fraction of the cost of dedicated horticultural electronics. The only downside is that the sockets aren't IP rated, so they need to be placed in a seperate waterproof box if exposed to humidity.
Visit the Inkbird Store
BHD28170
Quantity:
Order today to get by
Free delivery on orders over BHD 20
'%3e%3crect%20x='0.599609'%20width='22.4'%20height='16'%20fill='%230A17A7'/%3e%3cpath%20fill-rule='evenodd'%20clip-rule='evenodd'%20d='M-0.426196%20-1.53223L9.1335%204.91587V-1.06506H14.4668V4.91648L24.0263%20-1.53147L25.2193%200.237148L17.6615%205.33494H23.0002V10.6683H17.6618L25.2187%2015.7655L24.0258%2017.5341L14.4668%2011.0865V17.0683H9.1335V11.0871L-0.425634%2017.5348L-1.61858%2015.7662L5.93947%2010.6683H0.600172V5.33494H5.93977L-1.61914%200.236387L-0.426196%20-1.53223Z'%20fill='white'/%3e%3cpath%20d='M15.5332%205.06615L25.6655%20-1.59961'%20stroke='%23DB1F35'%20stroke-width='0.533333'%20stroke-linecap='round'/%3e%3cpath%20d='M16.6094%2010.9578L25.6924%2017.0801'%20stroke='%23DB1F35'%20stroke-width='0.533333'%20stroke-linecap='round'/%3e%3cpath%20d='M7.00176%205.04727L-2.47266%20-1.33789'%20stroke='%23DB1F35'%20stroke-width='0.533333'%20stroke-linecap='round'/%3e%3cpath%20d='M8.02936%2010.8842L-2.47266%2017.8486'%20stroke='%23DB1F35'%20stroke-width='0.533333'%20stroke-linecap='round'/%3e%3cpath%20fill-rule='evenodd'%20clip-rule='evenodd'%20d='M0.599609%209.6H10.1996V16H13.3996V9.6H22.9996V6.4H13.3996V0H10.1996V6.4H0.599609V9.6Z'%20fill='%23E6273E'/%3e%3c/g%3e%3c/svg%3e) Product origin: United Kingdom
Product origin: United Kingdom


X

Or share with link
https://bolo.com/